

Halloween is the perfect time to get creative with your gardening and decor! Upcycling tin cans into festive planters is eco-friendly, fun, and adds a whimsical touch to your porch, walkway, or indoor spaces. Thanks to @firstdayofhome, we have a detailed step-by-step guide to making your own Halloween tin planters, complete with painting tips and display ideas to make your fall decor pop.
With just a few supplies and your favorite Digz Gardening tools, you can create a DIY project that's perfect for both adults and kids.

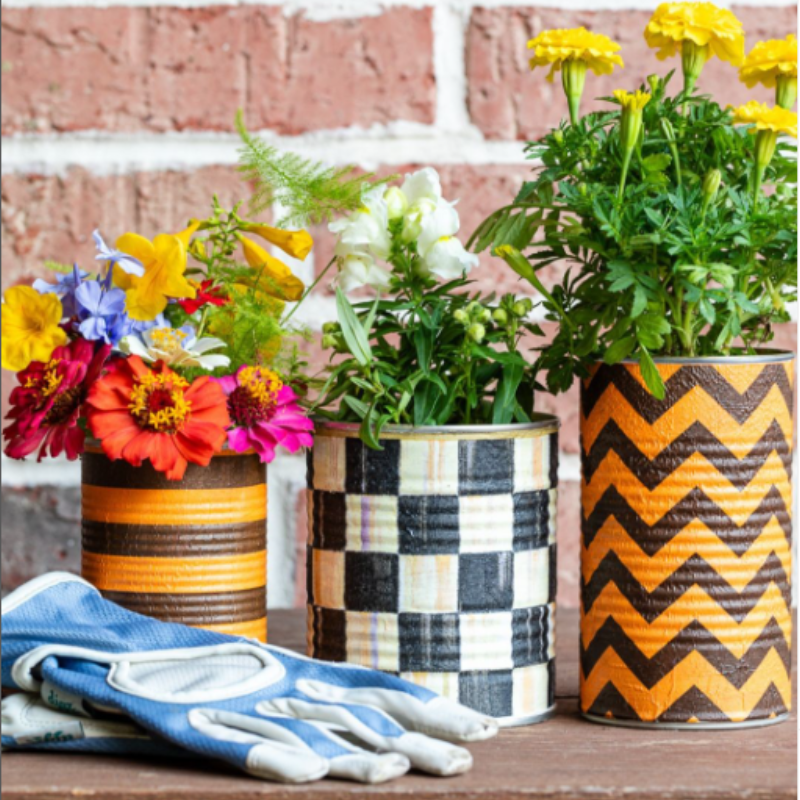
What You'll Need
- Clean, empty tin cans (various sizes work great)
- Drill or sharp tool for drainage holes
- White acrylic paint (and paintbrush)
- Halloween-patterened napkins
- Scissors
- Decoupage glue (such as Mod Podge)
- Foam brush or soft painting brush for glue application
- High-quality potting soil
- Fall plants - such as mums, pansies, or ornamental kale
- Digz Gardening gloves to protect your hands while painting, drilling, and planting
- Optional: Sandpapper for distressing, and a clear sealant spray for extra protection
Step 1: Prep Your Tin Can
Start by cleaning out any empty tin cans and removing labels or adhesive residue. Then, use a drill or sharp tool to add 2-3 small drainage holes at the bottom. This step is essential for keeping your plants healthy, as it prevents water from pooling and causing root rot.
Tip: Slip on your Digz Gardening Gloves to protect your hands while working with sharp edges and drilling.
Step 2: Paint the Base
Give your cans a fresh base coat of 1-2 layers of white acrylic paint. A neutral base helps your Halloween design stand out and gives a clean surface for decoupage. Allow each coat to dry completely before adding the next to avoid streaks or clumping.
Tip: If you want a rustic or vintage look, lightly sand the edges of the paint once it's dry for a weathered effect.
Step 3: Prepare the Halloween Napkins
Take your Halloween-themed napkins and carefully separate the plies so only the patterened layer remains. This ensures a smooth application and prevents wrinkling or tearing when gluing.
Tip: Handle the napkin gently, thin napkin layers can tear easily!
Step 4: Measure and Cut the Napkin
Measure your napkin around the can and trim so it fits snugly. Leave a small overlap for gluing. If your design has a central image, make sure it's positioned where it will be most visible on the finished planter.
Step 5: Decoupage the Napkin
Apply decoupage glue to the tin can in small sections. Carefully smooth the napkin over the glue, workiung from top to bottom to prevent airbubbles or wrinkles. Continue in sections until the entire can is covered.
Tip: A small foam brush wokrs best for even application of glue and prevents tearing delicate napkin patterns.
Step 6: Seal Your Planter
Once the napkin is securely attached, brush a top coat of decoupage glue over the entire surface. This seals and protects your design from water, soil, and general wear. Allow the top coat to dry completely before planting.
Step 7: Add Soil and Plants
Fill the can with high-quality potting soil, leaving about half an inch from the top to prevent overflow. Gently remove your chosen plants from thier pots, loosen the roots, and place them in the soil. Press lightly to secure them and add more soil around the roots as needed.
Fall favorites for your tin planter include:
- Mums for bright seasonal color.
- Pansies for cheerful blooms.
- Small ornamental grasses for texture and height.
Water lightly to settle the soil. Your Digz Gardenign Gloves make this step easy and mess-free, while protecting your hands from soil and moisture.
Step 8: Display Your Halloween Tin Planters
- Cluster plants together on your porch. steps, or entryway for maximum impact.
- Mix in mini pumpkins, hourds, or lanterns for a festive, layered look.
- Use a fall-themed wreath, garland, or string lights nearby to tie the display together.
DIY Halloween Fun with Dizg Gardening
Upcycling tin cans into Halloween planters is easy, creative, and eco-friendly. With few supplies, some seasonal napkins, and your Digz Gardening tools, you can make fun, spooky, and festive planters that brighten your porch and celebrate fall in style.


